Forms in BeHome247 empower you to streamline property management by standardizing processes and capturing essential data. Whether you're creating cleaning checklists, inspection reports, inventory counts, unit condition evaluations, or other custom workflows, our flexible form builder ensures you can tailor forms to meet your unique needs.
You can assign forms to specific properties or groups, making them a required step for completing tasks. This ensures consistency, accountability, and efficiency across your operations. With BeHome247, forms become a powerful tool to help you maintain high standards and stay organized.
In this guide, we’ll walk you through the steps to create and customize forms, assign them to properties or groups, and optimize them for various use cases.
To start creating a form in Behome247, follow these steps:
Follow these steps to ensure users are properly configured to receive notifications:
Accessing the Form Creation Page:
- Navigate to the main settings section via the left-hand menu.
- Locate and click on the "Forms" tab at the top of the settings page. This will take you to the forms management area.

Select Create New Form:
- In the forms management area, look for the “Create New Form” button, typically located in the top right corner of the screen. Click on this button to begin creating a new form.

Form Header: Fill out the Form Header
Upon clicking “Create New Form,” a pop-up window will appear. This window contains several fields and options that need to be filled out to set up your form: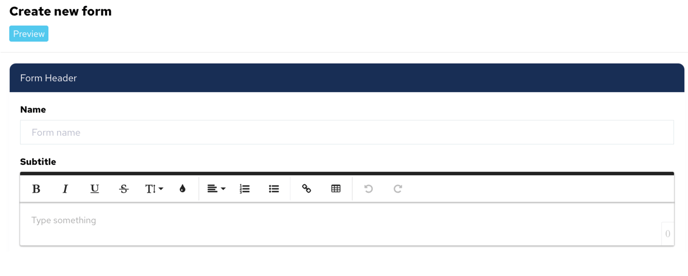
- Name: Enter the name of the form. This will be the title that users see when they access the form.
- Subtitle: This section allows you toadd more detailed information about the form, providing context or instructions to users. To enhance the text within this field, you have a variety of formatting options available:
-
- Bold: Emphasize key points or titles by making them bold.
- Italics: Highlight specific words or phrases with italics.
- Underline: Draw attention to important information by underlining it.
- Strikethrough: Indicate outdated or irrelevant text with a strikethrough.
- Font Size: Adjust the text size to ensure readability or to differentiate sections.
- Color: Change the text color to distinguish headings or important notes.
- Alignment: Align your text to the left, right, center, or justify it, depending on your needs.
- Ordered or Unordered List: Organize information in a numbered or bullet-point list for clarity.
- Insert Links: Embed hyperlinks within the text for quick access to relevant resources or external sites.
- Insert Tables: Create tables to organize data or present structured information clearly.
-
- Visibility Settings:

-
- Show Only for These Groups: You can restrict the visibility of the form to specific groups within your organization. By default, the form is visible to all groups unless specified otherwise. Select the groups from the dropdown menu.
- Show Only for These Properties: Similarly, you can limit the form’s visibility to specific properties. If no properties are selected, the form will be available across all properties.
-
Form Body: Creating and Customizing the Form Body:
The Form Body is the central part of your form where you structure and organize all the necessary fields and questions required for your inspections, checklists, or processes. Here's a step-by-step guide on how to create and customize the Form Body effectively.

Section: Adding Sections to Your Form
Sections help organize your form into logical groupings, making it easier for users to navigate and complete. Sections can represent various categories such as rooms, specific areas, devices, or operational functions that need to be checked.
Steps to Add and Customize Sections:
- Locate the "Add Section" Button:
- Within the Form Body area, click on the "Add Section" button located to the right of the form's title. This will insert a new section into your form.
- Name the Section:
- At the top of the new section, you'll find a field to enter the section name. Provide a clear and descriptive title that reflects the content of the section (e.g., "Kitchen Inspection," "HVAC System Check," "Safety Equipment").
- At the top of the new section, you'll find a field to enter the section name. Provide a clear and descriptive title that reflects the content of the section (e.g., "Kitchen Inspection," "HVAC System Check," "Safety Equipment").
- Add a Description (Optional):
- If additional context is needed, check the "Add Description" box below the section name.
- A text field will appear where you can enter detailed instructions or information pertinent to that section.
-
- The description field supports various text formatting options such as bold, italics, underline, strikethrough, font size adjustment, color selection, text alignment, as well as the ability to insert links and tables to enhance clarity and readability.
Organize Sections:
- Reordering Sections:
- Use the up (↑) and down (↓) arrows on the right side of the section header to move sections up or down within the form, allowing you to arrange them in the most logical and efficient order.
- Minimizing Sections:
- Click the minus (-) icon to collapse or expand sections, which helps manage space and focus on specific parts of the form while editing.
- Deleting Sections:
- If a section is no longer needed, click the trashcan icon to remove it from the form entirely.

Add Multiple Sections:
- Repeat the above steps to add as many sections as needed, allowing comprehensive coverage of all areas and processes required for your operations.
2. Lines: Adding Line Items within Sections
Within each section, you can add various line items
that represent individual questions, checks, or data entry fields. Here are the types of line items to suit different data collection needs.
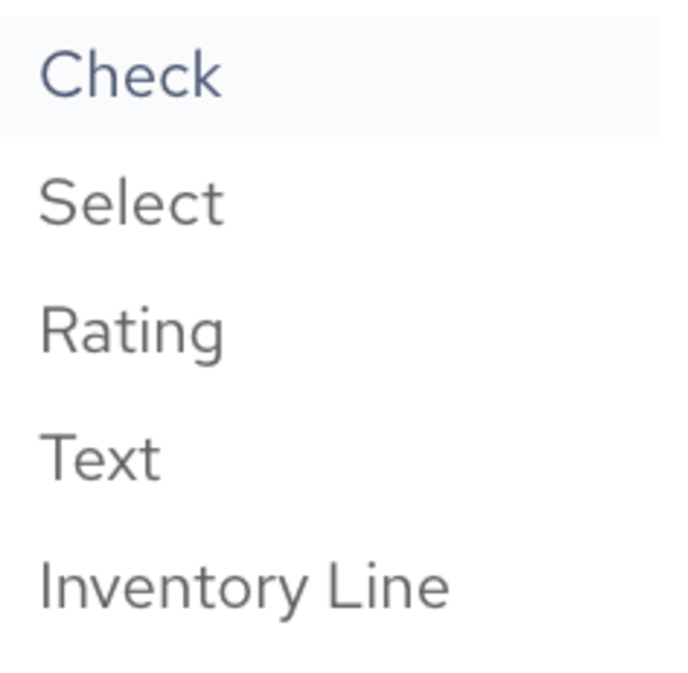
- Checkbox Option:
- Purpose: Ideal for simple yes/no or pass/fail questions, and for confirming whether a specific task or check has been completed.
- How to Add:
- Within a section, click "Add Line Item" and select "Checkbox".
- Enter the statement or question you want users to respond to (e.g., "Floor swept and mopped," "Fire extinguisher present and accessible").
- Users will check the box to indicate completion or affirmation of the item.
- Select Option:
- Purpose: Useful for questions that require users to choose from multiple predefined options.
- How to Add:
- Click "Add Line Item" and select "Select".
- Enter the question or prompt, then input the possible answers, separating each option with a comma (e.g., "Condition of walls: Excellent, Good, Fair, Poor").
- Users will select the appropriate answer from a dropdown menu.
- Five-Star Rating:
- Purpose: Suitable for rating the quality or condition of an item or area on a scale from one to five stars.
- How to Add:
- Click "Add Line Item" and choose "Five-Star Rating".
- Enter the item or aspect to be rated (e.g., "Cleanliness of bathroom," "Customer service experience").
- Users will select a star rating that best reflects their assessment.
- Text Response Line Item:
- Purpose: Allows for open-ended responses, enabling users to provide detailed comments, descriptions, or notes.
- How to Add:
- Click "Add Line Item" and select "Text Response".
- Enter the prompt or question (e.g., "Describe any maintenance issues observed," "Additional comments").
-
- Users will type their responses into a text box provided.
-
- Inventory Line Item:
- Purpose: Designed for tracking quantities or statuses of inventory items within a property or area.
- How to Add:
- Click "Add Line Item" and choose "Inventory".
- Enter the inventory item name and specify any details or parameters needed (e.g., "Number of towels available," "Stock level of cleaning supplies").
- Users will input numerical values or select statuses as appropriate.

Customizing Line Items:
- Reordering Line Items:
- Similar to sections, you can rearrange line items within a section by clicking on the white space within the fields on the specific line items that you want to adjust up/down and then use the up/down buttons to the top right of the line item field just before you reach the section header line.
- Making Line Items Required:
- You can set certain line items as mandatory by selecting the checkbox, ensuring that users must complete them before submitting the form. This helps in maintaining data consistency and completeness.
- Adding Help Text or Tool tips:
- For additional guidance, you can add help text or tooltips to line items, providing users with more context or instructions as needed.
Example Workflow for Creating a Section with Line Items:
1. Create a Section for "Kitchen Inspection":
- Name: Kitchen Inspection
- Description: "Ensure all kitchen areas and appliances meet cleanliness and operational standards."
- Checkbox: "Stove and oven cleaned thoroughly."
- Checkbox: "Refrigerator emptied and sanitized."
- Five-Star Rating: "Overall cleanliness of countertops."
- Select Option: "Condition of kitchen appliances: Excellent, Good, Needs Repair."
- Text Response: "Notes on any damages or issues observed."
- Inventory: "Number of clean dish towels available."
3. Organize and Review
4. Rearrange line items as needed for logical flow.
5. Set necessary line items as required to ensure critical checks are not overlooked.
6. Preview the section to ensure all information is correctly presented and formatted.
Form Footer: If there are any additional notes or disclaimers related to the form, they can be added in the footnote section.

Saving and form completion: It is important to note that there is a two step save process, one when saving the form itself (soft save) and then another one on the global settings page under the forms tab to save the completed form to the system (Hard save)
